Decluttering Your Home: Step‑by‑Step Guide Before Moving Items to Storage
Why Decluttering Before Storage Matters
We all love the idea of a spacious, airy home. But over time, belongings accumulate. Closets get stuffed, garages become impassable, and suddenly, you need more room. Moving items to a storage unit is a fantastic solution to reclaim your living space, but simply boxing up everything you own isn’t the best strategy.
Before you start your move to storage, taking the time to declutter is essential. It might feel like extra work upfront, but the payoff is huge. By sorting through your belongings first, you save money by renting only the space you truly need. You also save time by not packing items you’ll never use again. Think of this process as a reset button for your home environment. A little preparation now ensures your future self isn’t paying to store broken appliances or clothes that haven’t fit in a decade.
Step 1: Create a Decluttering Plan and Timeline
Trying to declutter home areas all at once is a recipe for burnout. Instead, treat this project like any other important task: make a plan. Start by setting a realistic timeline based on when you need to move your items. If you have a month, dedicate one weekend to the garage and another to the bedrooms.
Break the work into small, manageable chunks. You might tackle one room per day or even one closet per evening. Write down your goals. For example: “Clear out the guest room closet by Friday.” Having a visual checklist keeps you motivated as you cross off completed tasks. Remember, consistent progress beats a frantic rush at the end.
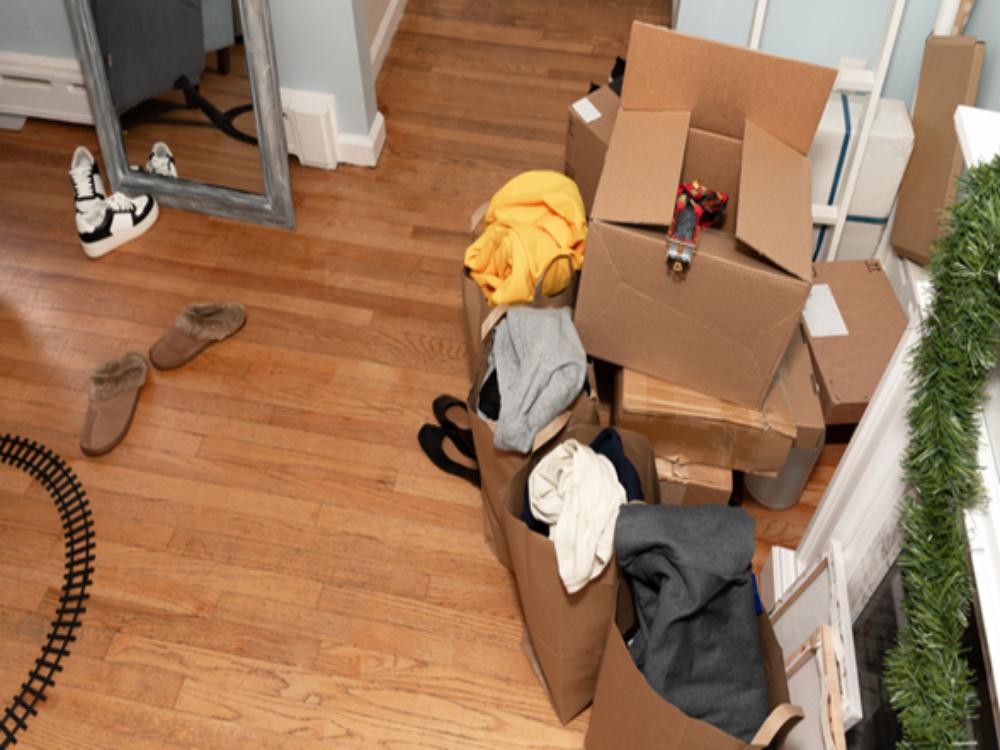
Step 2: Sort Items into Keep, Donate, Sell, or Discard
Once you have your plan, it’s time to get your hands dirty. The most effective way to sort is the “Four-Box Method.” Bring four large boxes or bins into the room you are working on and label them:
- Keep (Storage): These are items you love or need but don’t have room for right now. They are the candidates for your storage unit.
- Donate: Items in good condition that you no longer want. Southern California has plenty of charities that would love gently used furniture, clothes, and housewares.
- Sell: Valuable items that aren’t worth storing but could put some cash in your pocket. Think vintage décor or electronics.
- Discard/Recycle: Broken items, expired goods, or papers that can be shredded.
Step 3: Prepare Items Properly for Storage
You’ve decided what to keep. Now, you need to protect those investments. Tossing loose items into a unit invites damage, dust, and disorganization. Follow this storage prep checklist to ensure your belongings come out of storage looking as good as they did going in:
- Clean Everything: Never store dirty items. Wash clothes, vacuum upholstery, and wipe down furniture. Food crumbs can attract pests, and dirt can cause permanent staining over time.
- Disassemble Furniture: Take apart bed frames and tables to save space. Place screws and bolts in a abelled plastic bag and tape it securely to the furniture piece.
- Pack in Uniform Boxes: Use sturdy, same-sized boxes for easier stacking. Avoid plastic bags, which can trap moisture and promote mildew.
- Label Clearly: Write the contents and the room it belongs to on the side of every box. This makes retrieving specific items later much easier.
Step 4: Choose the Right Storage Unit for Your Needs
With your “Keep” pile ready, you can accurately estimate how much space you need. Choosing the right unit size saves you from paying for empty air or realizing too late that your couch won’t fit.
For a self-storage move, consider both size and features:
- Size: A 5×5 unit is great for boxes and small furniture (like a walk-in closet). A 10×10 fits the contents of a one-bedroom apartment.
- Climate Control: If you are storing sensitive items like wood furniture, electronics, or artwork, climate-controlled units help protect against temperature fluctuations.
- Accessibility: Do you need drive-up access for heavy items?
If you aren’t sure, make a list of your largest items and consult with a storage professional who can recommend the perfect fit.
Step 5: Load and Organize Your Storage Unit Efficiently
Loading your unit is like playing a real-life game of Tetris. A little strategy goes a long way toward maximizing space.
- Create an Aisle: Leave a small path down the center of your unit. You don’t want to unload the entire unit just to reach a box in the back.
- Heavy on Bottom: Place heavy boxes and sturdy furniture at the bottom of stacks to prevent crushing.
- Use Vertical Space: Stack high to use the full volume of the unit. Shelving units can be a great addition inside larger storage spaces.
- Frequent Access: Keep items you might need soon, like holiday decorations or seasonal documents, near the front door.
Why Pouch Self Storage Is Ideal for Decluttering Projects
When you are ready to move your decluttered treasures, Pouch Self Storage is here to help. We understand the local lifestyle and the need for flexible space.
We offer convenient locations across Southern California, making it easy to pop in and grab what you need. Our facilities feature a wide variety of unit sizes, so you never have to pay for more space than you use. Plus, our friendly “We Make It As Easy As It Should Be” philosophy means you get excellent customer service from start to finish. Whether you need a small locker for seasonal gear or a large unit for a whole-home renovation, we have the security and convenience you need.
Visit Pouch Self Storage today or contact us to reserve your unit. Let us help you create the space you deserve.